# The Indico Editorial Module for JACoW
:::danger
**Important Disclaimer**: This document describes the Indico editing workflow from the JACoW perspective as it is currently. [Many changes](https://codimd.web.cern.ch/s/7bB12pwI0#) are already planned and this document will be updated accordingly when the changes are deployed.
:::
## Overview of the Indico Document Assessment Workflows
Indico provides several quality assessment workflows (`Paper Peer Review` and `Editing`) for submitted documents adapted to many different use cases. The purpose of all these workflows is to have the submitted documents evaluated by one or several assessors, possibly improved by them or by their authors, then accepted or rejected by a referee before publishing.
The `Paper Peer Review` workflow is usually applicable for assessing the scientific content of the submitted papers. It also includes a layout review option which should always be disabled for a JACoW conference because in this case the layout assessment will be done through the `Editing` workflow.
The `Editing` workflow is an assessment process tailored to the JACoW technical editing use case. This is the one which should primarily be used for a JACoW conference. Through this process, editors review the page margins, check for typos, check that headings/chapters/sections are properly formatted, check that figures and references are in the correct order, check all references in the text against the list of references, and make changes as necessary.
### Integration with the Paper Peer Review Workflow
The `Paper Peer Review` workflow can be activated in parallel to the `Editing` workflow for a JACoW conference. In this case this peer review will take place before the editing one according to the following diagram:

### Main differences between Paper Peer Review and Editing Modules
The `Paper Peer Review` module allows:
- Several reviewers per paper
- A `Judge` role which makes the final decision
- The review to be established according to various questions defined as Rating/Boolean/Text
- No direct interaction between the reviewer and the author
- Review of papers
The `Editing` module allows
- A single editor per paper
- A direct interaction between editor and author
- The editor makes the final decision
- The possibility for the editor to make changes to the files or request changes directly to the author.
- Review of papers, slides and/or posters
### The Editing Workflow
:::info
:warning: In the rest of this documentation we'll refer to the document being assessed as an `editable` for the sake of simplification. Still in the case of the editing module, this document could be a paper, a slides deck or a poster. The editing process is exactly the same for all three types of documents.
:::
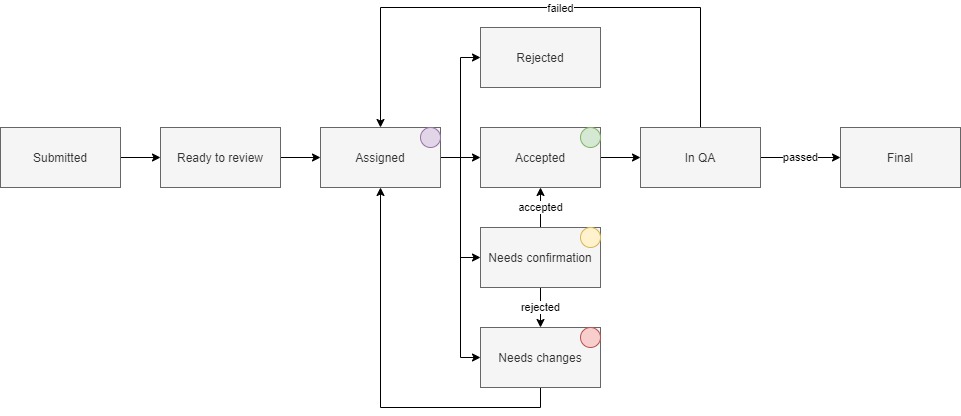
#### Editing States
The editable can be in one of the following states:
* **Submitted** - this is an "ephemeral" state (vanilla Indico) which is given to newly submitted editables. As soon as they are submitted, the PDF files will be automatically processed ("distilled") and the state will move to Ready to Review. The original file can still be accessed through the revision history;
* **Ready to Review** - the editable is ready to be assigned and reviewed by an editor. This means that "distilling" has been concluded. A system user called **Indico Bot** will do the distilling automatically and leave the editable in this state;
* **Assigned** - the editable has been assigned to an editor ("purple dot");
* **Accepted** - final state - the editable has been accepted ("green dot");
* **Rejected** - final state - the editable has been rejected; This status is usually not used in JACoW conferences
* **Needs changes** - the editable needs corrections to be performed **by the author(s)** ("red dot");
* **Needs confirmation** - the editor has made modifications to the editable, which **need to be approved** by the author(s) ("yellow dot");
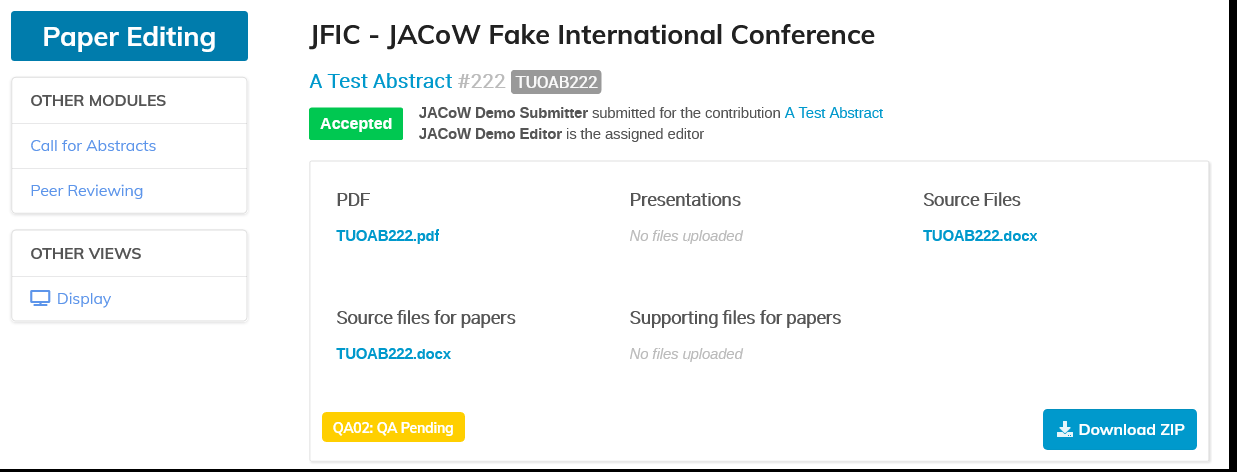
* **In QA** - After the editor accepts the paper, the scientific secretary does a last quality check before the paper is published. This is characterized by an "Accepted" status and a "QA02: QA Pending" tag.
* **Final** - the editable is ready for publishing. This is characterized by an "Accepted" status and a "QA01: QA Approved" tag.
Here is a diagram of the editing states progression:
## Setting up the Editing Workflow
### Activating the Editing Module
While in the edit mode of your Indico conference, click on the `Editing` menu item in the left-hand-side menu under the `Workflows` section.

Then click on the `Enable module` button.

### Activating the JACoW Editing Microservice
Your conference needs to be connected with the special JACoW Editing Microservice in order to automatically get JACoW-specific features that Indico does not provide by default.
In order to activate the JACoW Editing Microservice:
Go to the Editing module, then click on `Connect` in the `Custom editing workflow` section

Then paste `https://test-openreferee-jacow.web.cern.ch/` in the `Service URL` field and press `Connect`:

Here is a description of each special feature activated by this micro-service:
#### Automatic creation of standard JACoW editing tags:

The first 3 tags (PRC, QA01 and QA02) are created as system tags: they cannot be modified or deleted, and cannot be assigned by editors to papers. They are automatically assigned by Indico to represent the state of an editable:
- PRC: When a paper has been distilled
- QA02: When a paper has been accepted
- QA01: When a paper has been accepted and passed the final QA
The TC tags are tags representing error codes. They can be assigned to a paper by the editor.
#### Automatic creation of standard JACoW file types:


#### Introduction of the final QA state
This is a specificity of the JACoW editing workflow: Once accepted by the editor, the papers must go through a final QA process described in the [Publishing section](#Publishing).
#### Automatic distilling of submitted tex files
This is another specificity of the JACoW workflow: Each time a PDF is uploaded by the author or the editor, Indico will automatically distill it, replacing the original file. The original file is still visible in the history of revisions.
### Activating the Right Editing Workflows
An editing workflow can be applied to three different types of documents in Indico:
- Paper
- Slides
- Poster
JACoW conferences with the aim to publish proceedings will normally always use the Paper editing workflow. Depending on your conference you may also want to activate one or several of the others. The alternative for collecting other files without passing them through a review process, is to use the standard Indico `Material Submission` process.
In order to activate one or several editing workflows, go to the `Editing` module, then activate the toggle right of the `List of editable types`.

Activate the toggle right of each type for which you want to activate the editing workflow, then `Save`.
The display then switches back to the list of activated workflows.

Click on the **Manage** button of the desired editing workflow in order to configure it (see following sections).
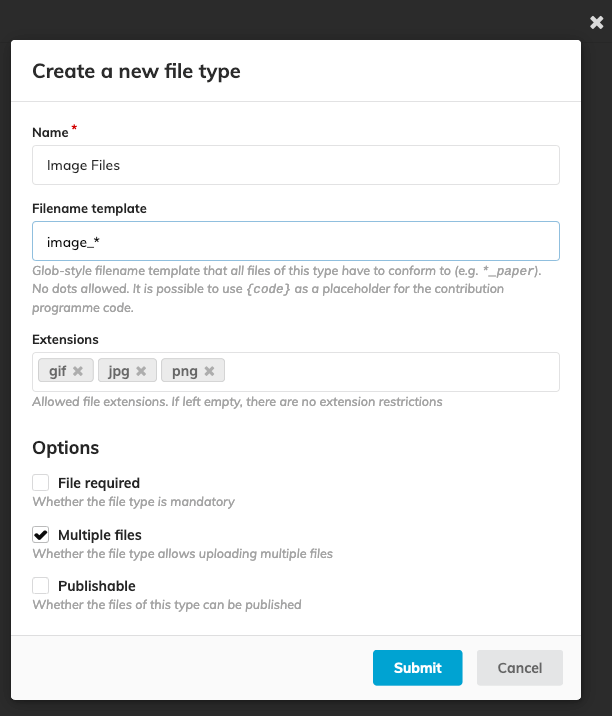
### Configuring the File Types
One of the key instruments in ensuring the quality of submitted material in JACoW conferences is the possibility to limit users with regards to the type of files they submit and how they name them. This makes things more predictable so that further workflows (human and automated) can process the data accordingly and usually helps avoiding mistakes.
This is handled through **File Types** which can be seen as folders into which submitters upload their editable files.
Specific File Types can be set for each editing process (so independently for papers, slides and posters).
In order to configure your File Types for a given editing process, click on the Configure button in the File types section.

You can then add new File Types, edit or delete existing ones.
For each File Type, the following fields can be configured:
* **Name** - which will be displayed on the interface;
* **File name template** - the format which the name of the file to be uploaded should follow; this will be enforced when the user will submit the editable files; the template can include the {code} placeholder which will be replaced by the contribution programme code
* **Extensions** - allowed file extensions for that file type;
* **File required** - whether the file type is mandatory (at least one file required);
* **Multiple files** - whether the file type allows for more than one file;
* **Publishable** - whether the contents of the type should be displayed publicly once the editable is published.
:::info
A standard JACoW conference will usually implement the following File Types:
- For Papers:
- PDF
- Extensions: `pdf`
- Filename template: `{code}_paper`
- [x] Required
- [x] Publishable
- Source Files
- Extensions: `tex`, `doc`, `docx`, `odt`
- Filename template: `{code}_paper`
- [x] Multiple
- Supporting files
- No extensions restriction
- [x] Multiple
- For Slides:
- PDF
- Extensions: `pdf`
- Filename template: `{code}_slides`
- [x] Required
- [x] Publishable
- Source Files
- Extensions: `ppt`, `pptx`, `tex`,`odp`, `keynote`
- Filename template: `{code}_slides`
- [x] Multiple
- For Posters:
- PDF
- Extensions: `pdf`
- Filename template: `{code}_poster`
- [x] Required
- [x] Publishable
- Source Files
- Extensions: `ppt`, `pptx`, `ai`, `odp`, `tex`
- Filename template: `{code}_poster`
- [x] Multiple
:::
:::danger
:warning: **Beware:** If you use {code} in your file name template, make sure programme codes are assigned to all contributions before you open up the files submission.
:::
### Configuring the Ready for review Conditions
This is where you define minimum requirements an editable has to fulfill in order to be considered ready for editing. You can define conditions based on the type of the received files, combined with AND and OR operators.
In order to configure your Ready for review conditions for a given editing process, click on the Configure button in the Ready for review conditions section.

Then add the appropriate File Type conditions.

### Setting up the Editing Team
An editing team can be configured separately for each type of editable (Paper, Slides and Poster). Editors for a given type of editable will only be able to edit files of this type.
The editing teams can include users and/or roles.
You can define your editing team for a given editing process by clicking on the Manage Team button in the Editing team section.

You can then add multiple users and roles to the team.
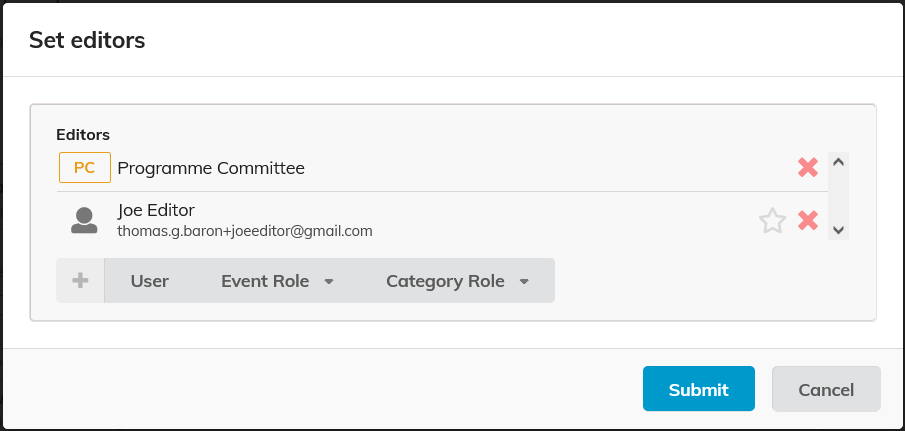
You can send emails to this editing team or part of it by clicking on the  button.
If you wish the editing process to be anonymous, make sure this toggle  is activated. In this case, the names of the editors will be anonymised everywhere on the interface.
### Assigning editors to editables
Administrators can assign editors to editables by going to the list of editables () .
One or several editables can be assigned to an editor or to yourself in a go.
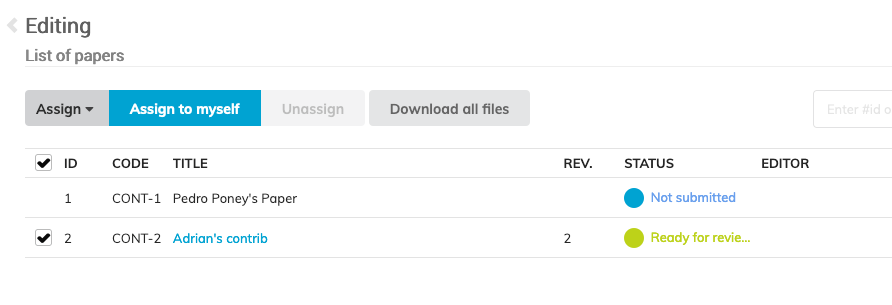
If you want editors to self assign editables, then make sure the `Allow editors to self-assign editables` toggle is activated on the editing configuration page.

### Opening the Submission
Files can be submitted by Authors only when the submission of files is open.
Open the submission of files by clicking on the Start now button.

It can be closed at any time by clicking the "close now" button.

### Starting the Editing
Editables can be assigned to editors only when the Editing is started.
Start the editing process by clicking on the Start now button.

You can then close it at any time by clicking on the "Close now" button.

## Editor's Perspective
This section shows how the editing process looks like from the perspective of an editor.
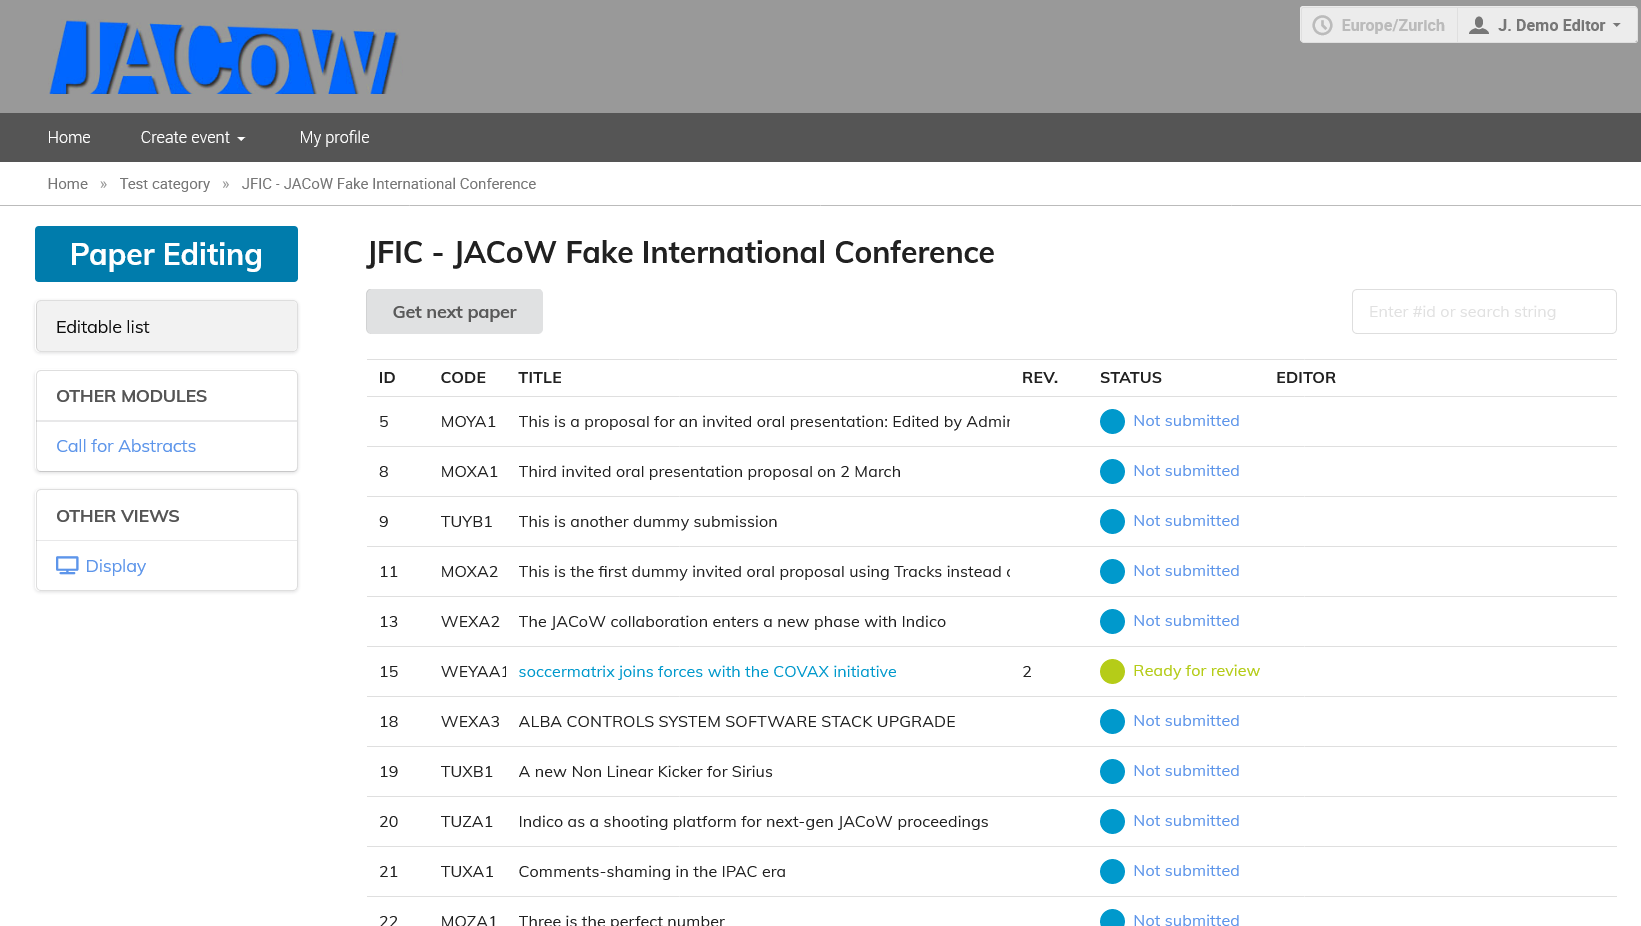
An editor will access the dedicated editing area by clicking one of the options (Papers, Slides or Posters) in the "Editing" section of the left-hand side menu of the Indico page.
This gives access to the list of contributions and their statuses, and to various options.
### Getting a paper assignment
If the administrator has activated the self-assignment option, then a "Get next paper" button appears on the editing page. Click on it to assign a new editable to yourself.
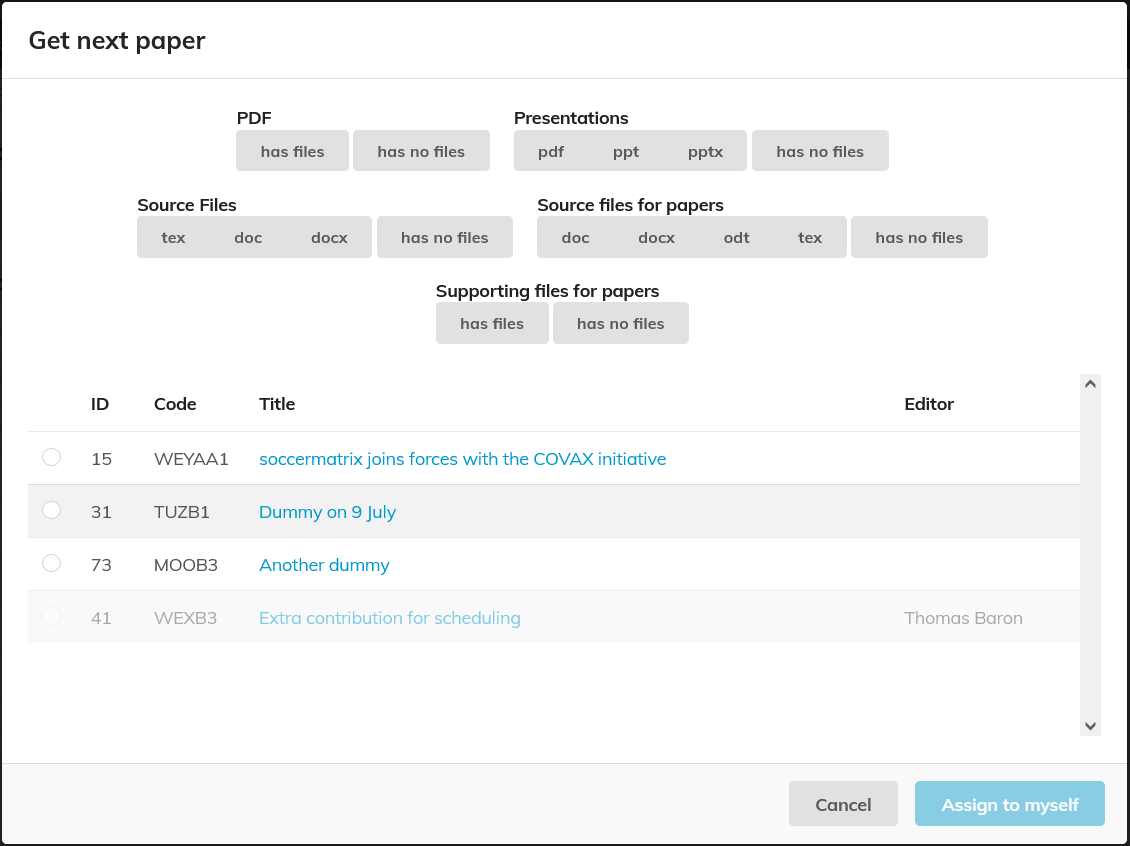
Editables can be filtered by several criteria allowing you to choose the editables which are more suitable to your local environment.
If the self-assignment option is not enabled, then the editor will see directly in the list of editables which ones have been assigned to them by the administrators.
### Checking list of Assignments
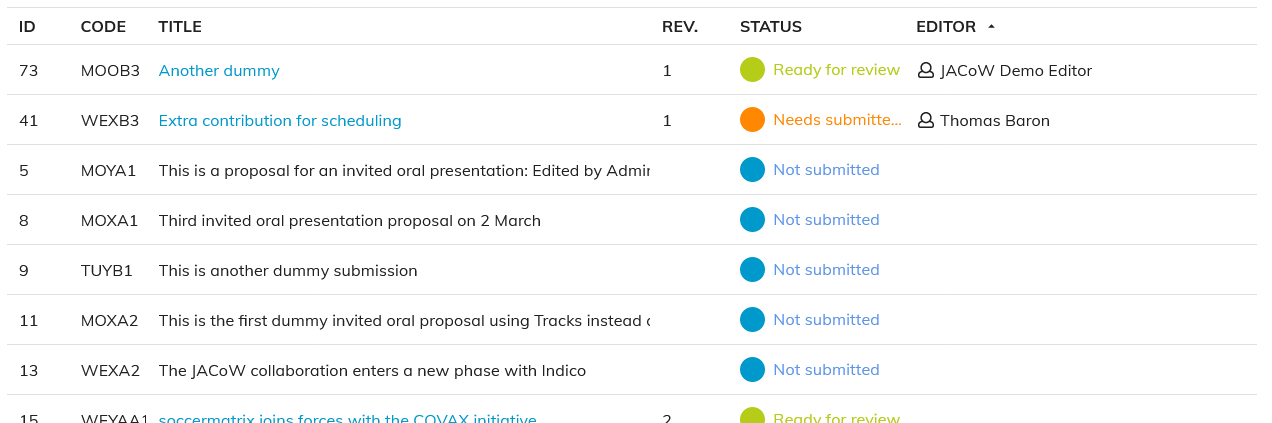
In the list of editables, just click on the "EDITOR" column header, to sort the editables by assigned Editor's name and retrieve the ones which are assigned to you.
Click on the title of the editable to start the editing process.
### Editing a document
Clicking on the title of the editable opens up the editing timeline. Revisions are represented in different boxes and actions can be performed on the spot with little menu-diving.
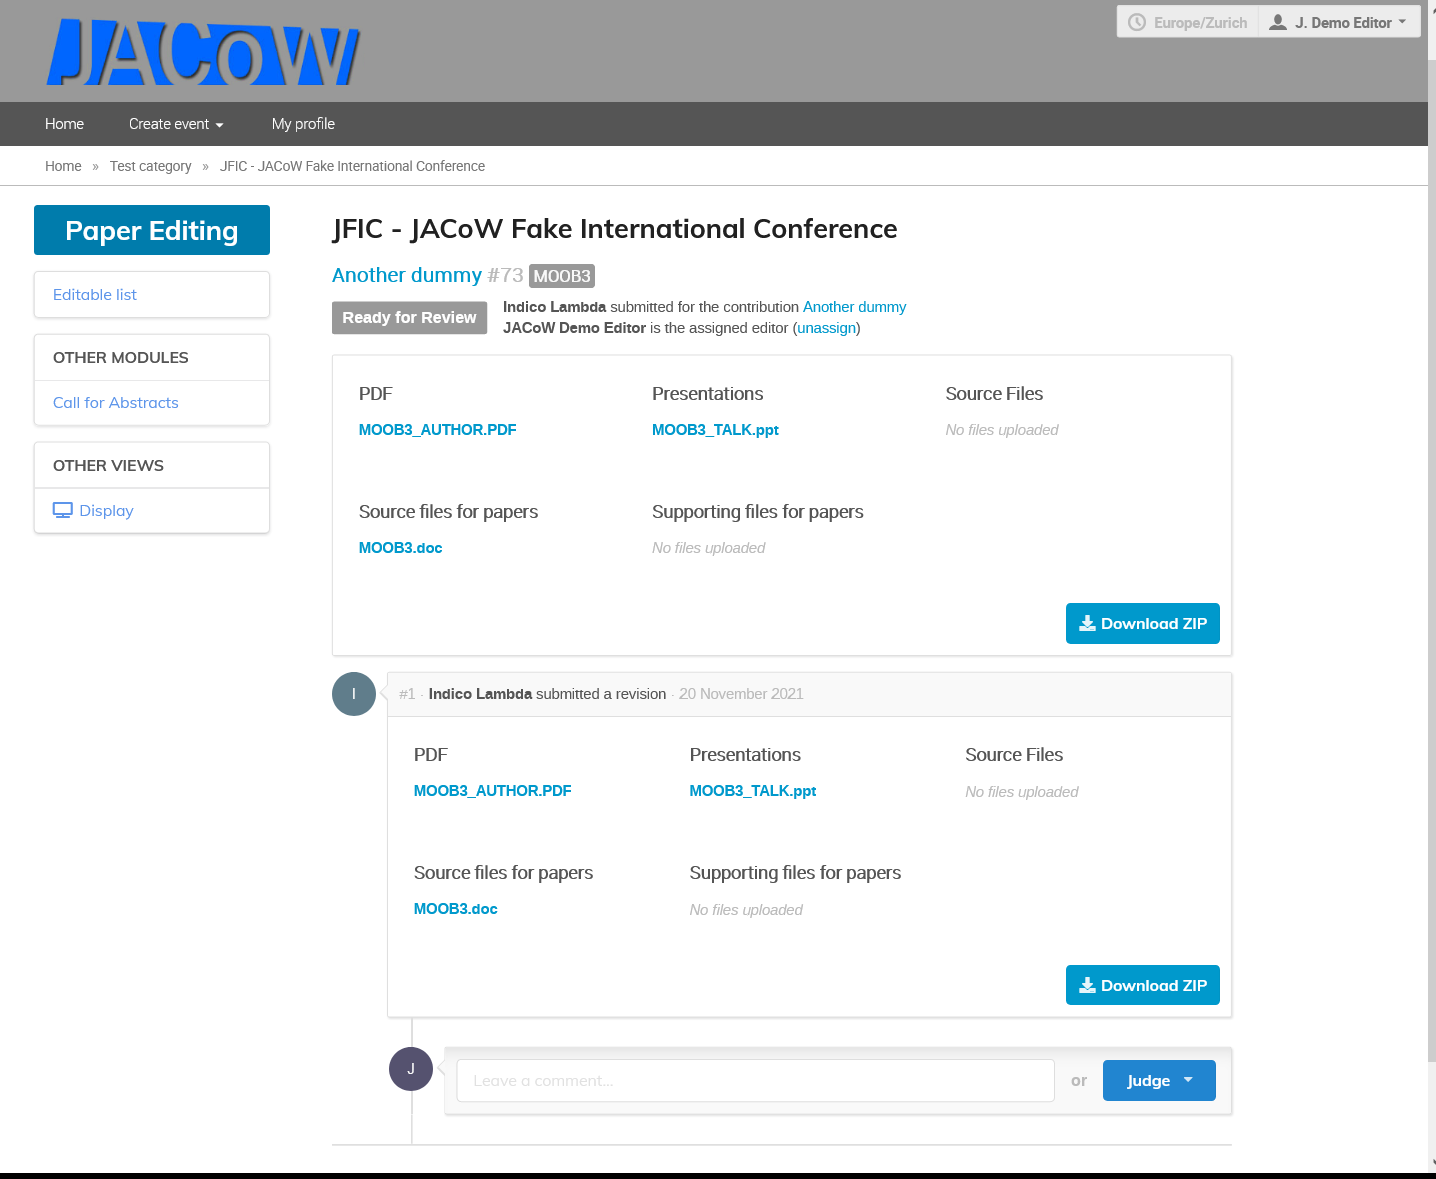
The top part of the page shows the editable title, its ID, programme code, status, submitter and assigned editor.
The first box shows the **latest** revision of the files.
Then the boxes underneath show **all the actions and comments** made during the editing process **by chronological order**.
#### Commenting
Comments can be added by **any of the editors** set for the given editable type.
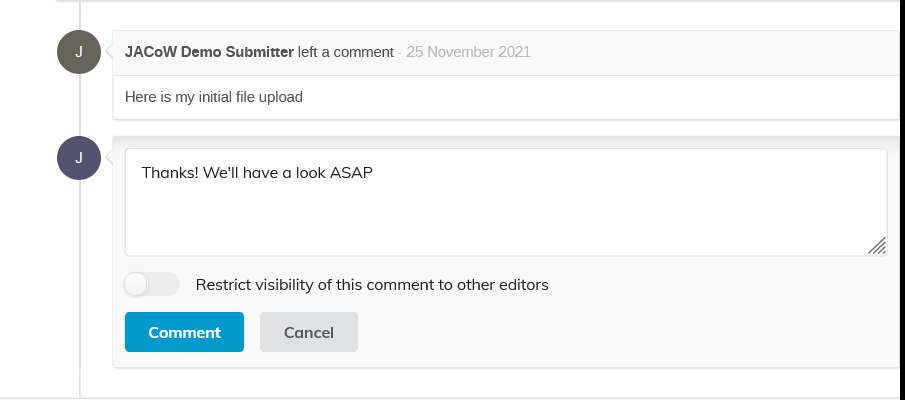
The visibility of a comment can be restricted to **other editors only**. In this case the submitter will not see it in their own timeline.
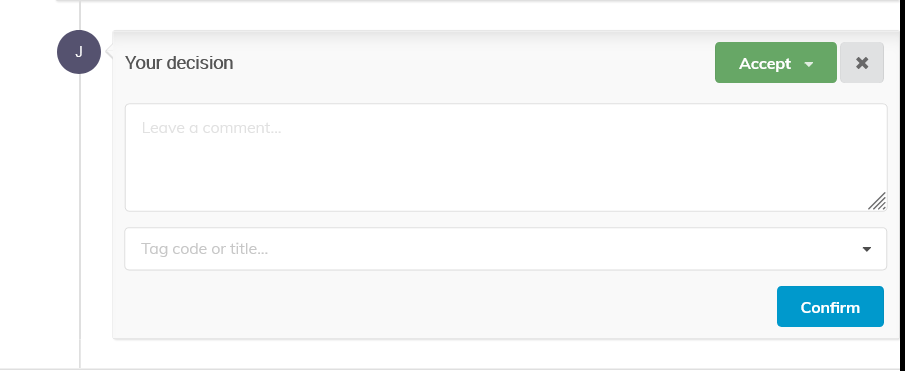
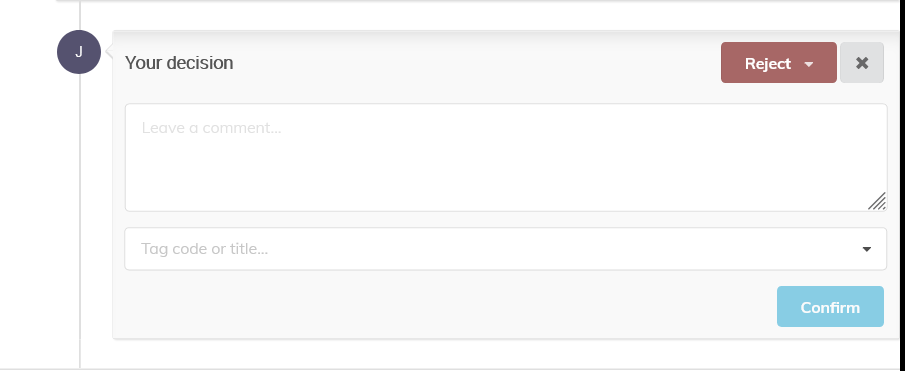
#### Judging
Only the editor assigned to the editable can assign a judgment. It is accessible at the bottom of the timeline, through the Judge button.

It gives access to 4 options:
- Accept
- Reject
- Make changes
- Request changes
#### Accept
Choose this option when the editable is ready for publishing. This will move the editable to the "Accepted" status, and notify the author by email. This is nearly the end of the editing process (the editable needs to pass a final QA process before being fully publishable)
#### Reject
Choose this option when the editable is simply rejected for publishing. It will move the editable to the Rejected status and notify the author by email.
#### Make Changes
Choose this option when you have made some changes to the editable files yourself. You can upload the new files in the dialog which opens up. The new revision will then be notified to the author by email for validation. Beware you must also submit a comment or the "Confirm" button will not be activated.
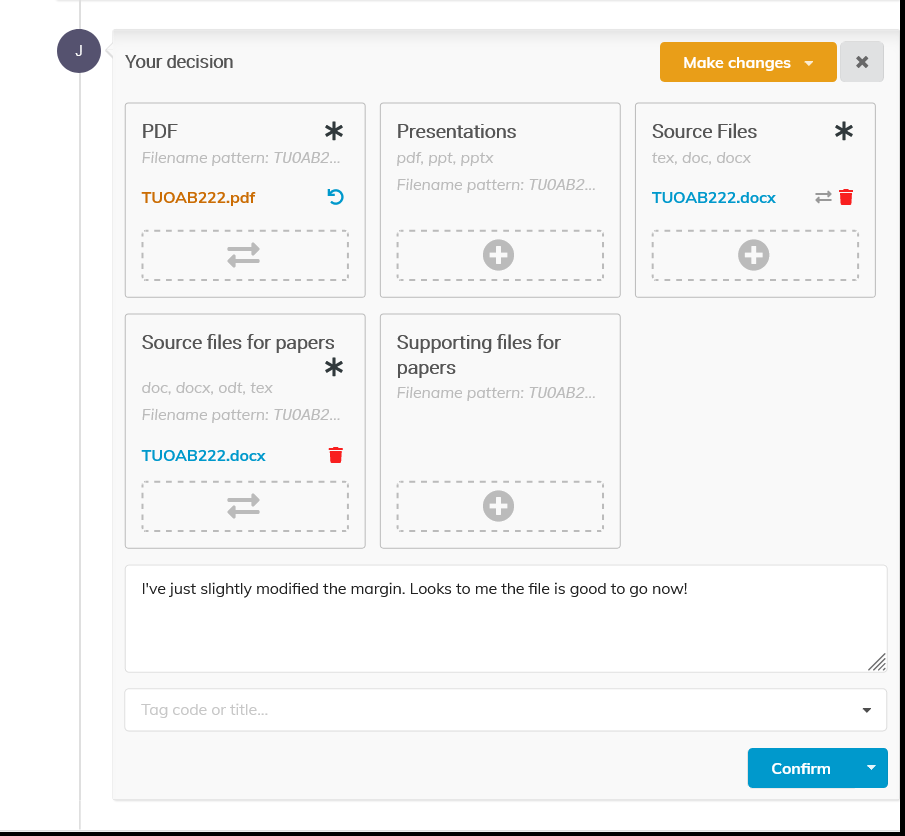
If the author **rejects** your changes, they will be invited to upload a new version themselves, and you will be notified by email.
If the author **accepts** your changes, then the editable status moves to "Accepted" and this is nearly the end of the editing process (the editable needs to pass a final QA process before being fully publishable).
In both cases, you are **warned by email**.
You also have the possibility to bypass the author's affiliation when uploading a new version of the file. For that purpose, use the "Confirm & Approve" button.
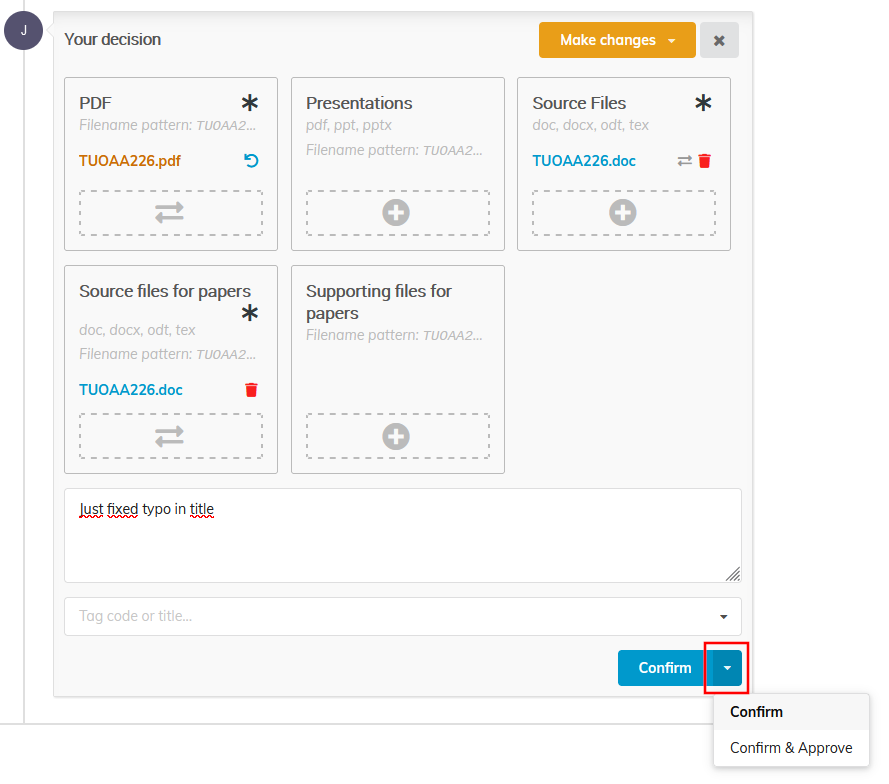
The new revision will then be accepted straight away.
#### Request changes
Choose this option when you want the authors to make some changes themselves. You can then explicit your request using the Comments field and the error tags list. The status of the editable then changes to "Needs changes", and an email is sent to the author.

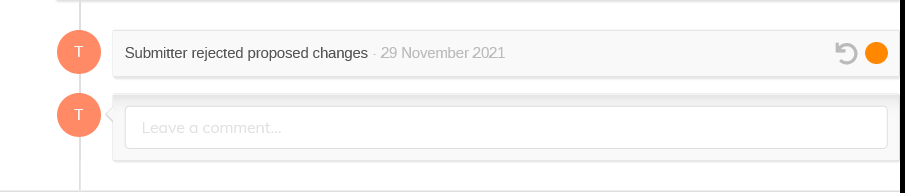
#### Undo the last Action
You can always undo the last action you took on a paper by clicking the rounded arrow next to the status dot.
## Author's Perspective
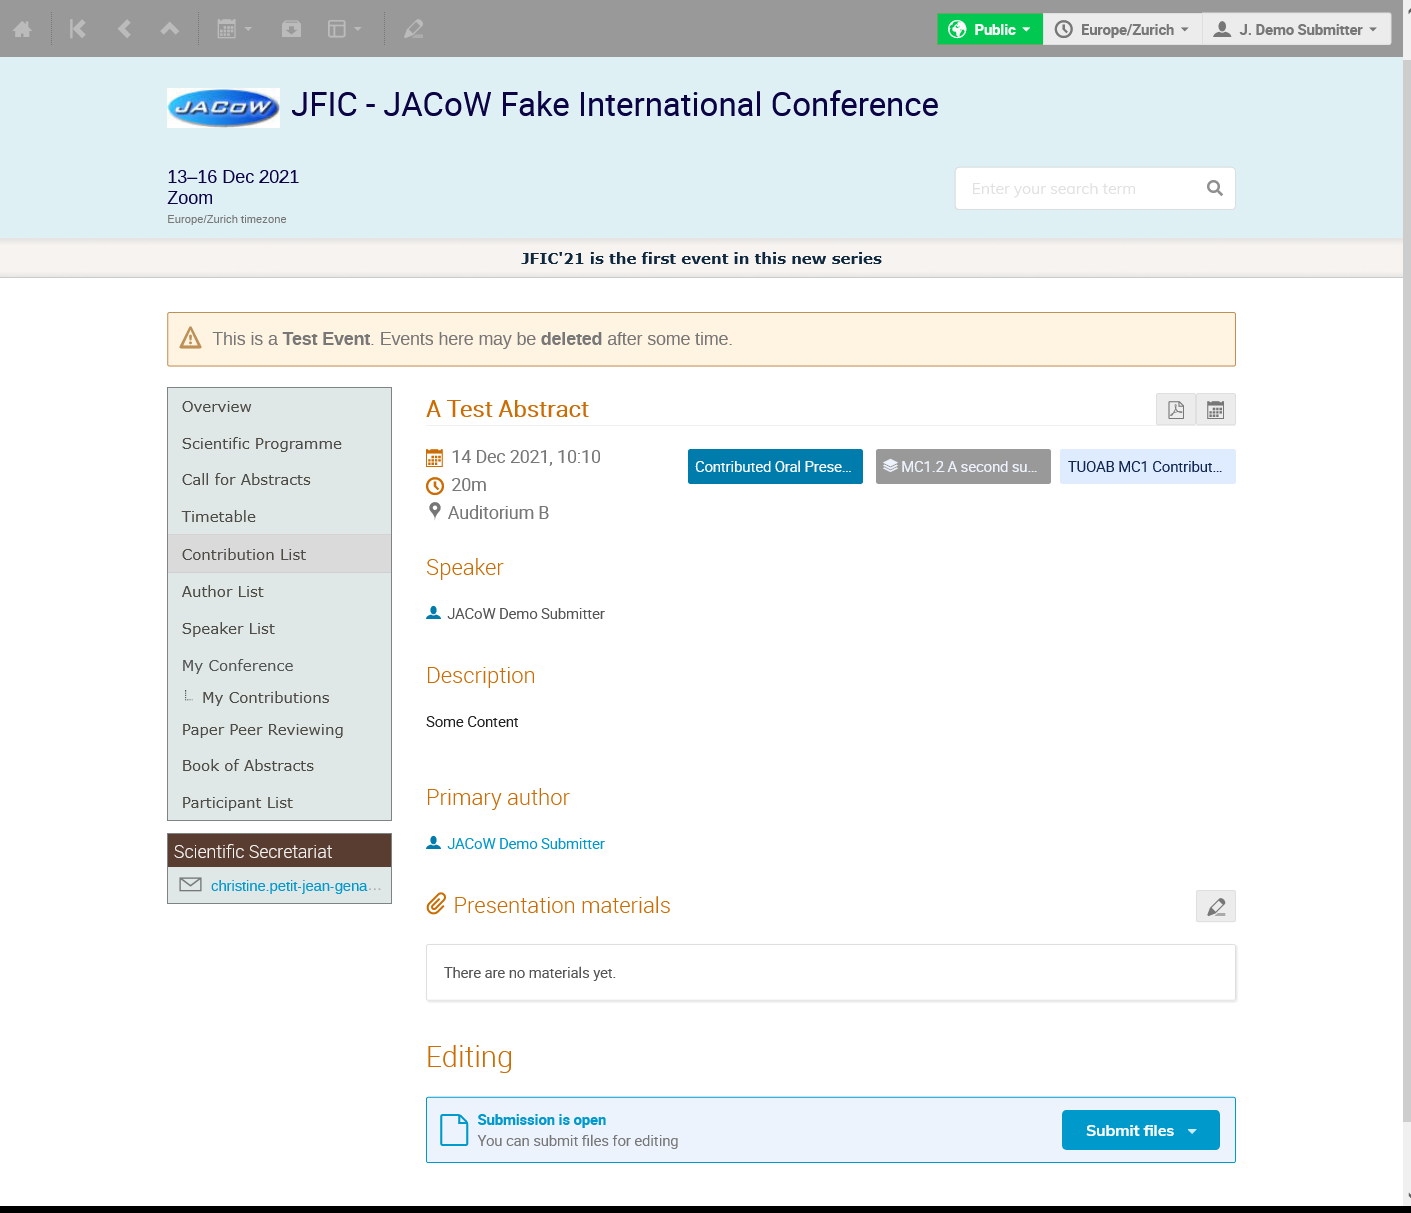
The explanations in this section supposes that you, as an author, have already submitted an abstract to the conference and that your abstract has been accepted. In this case you will see an additional menu item on the Indico page of the conference called "My Contributions" under the "My Conference" section.
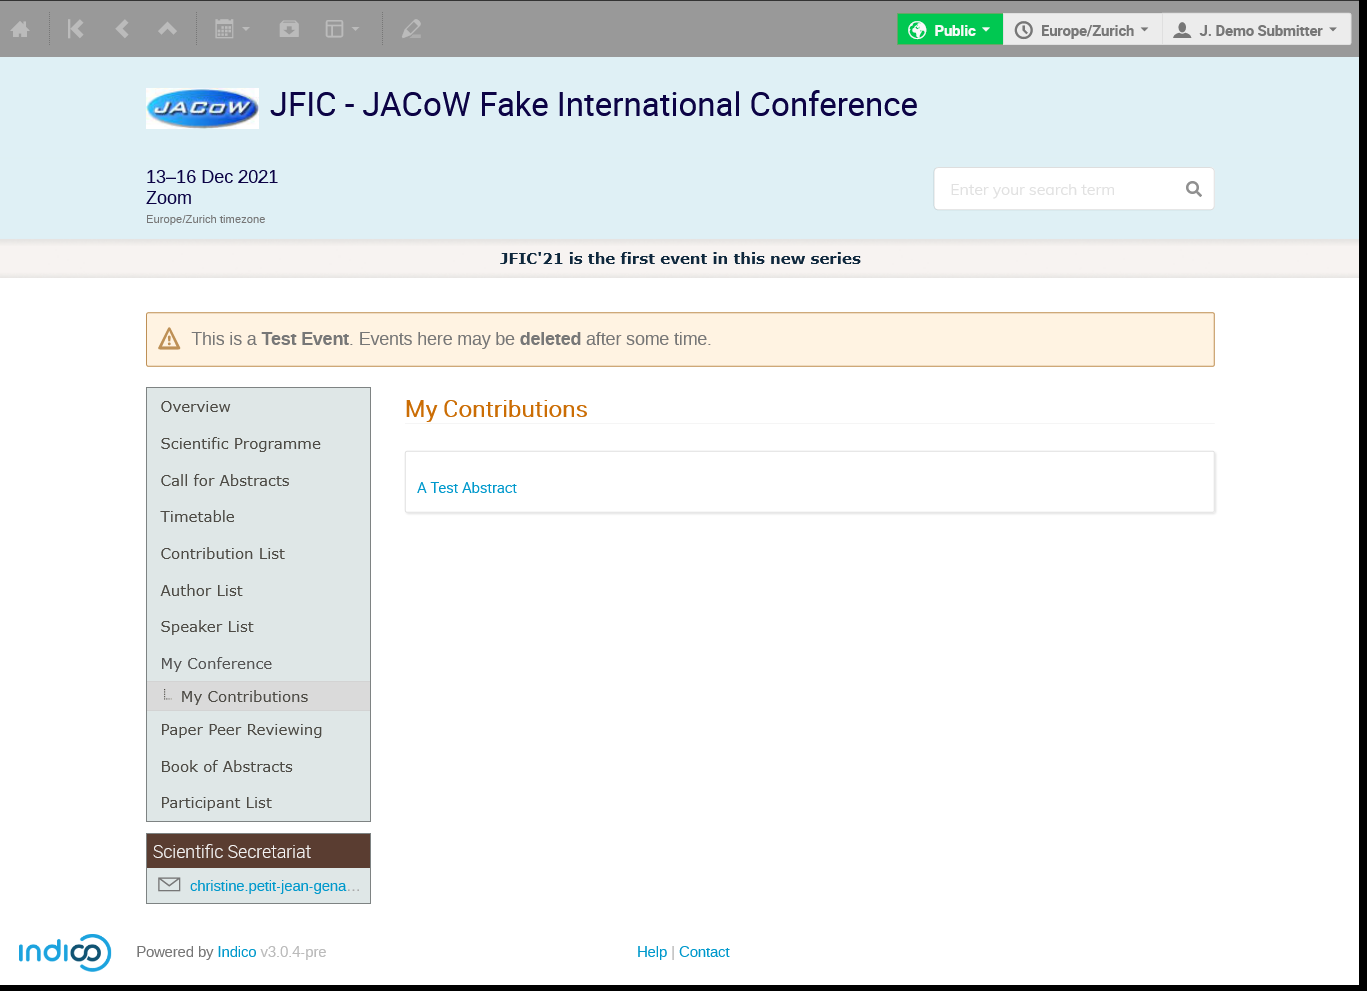
Clicking on the contribution you wish to manage gives you access to the detailed page for it:
### Initial File Upload
Files sent to the editing process should be sent through the Editing section (:warning: not through the "Presentation materials" section!):

This section will appear only after the administrators have opened the submission.
In this section, you can submit files for three different editing processes: Papers, Slides and Posters.
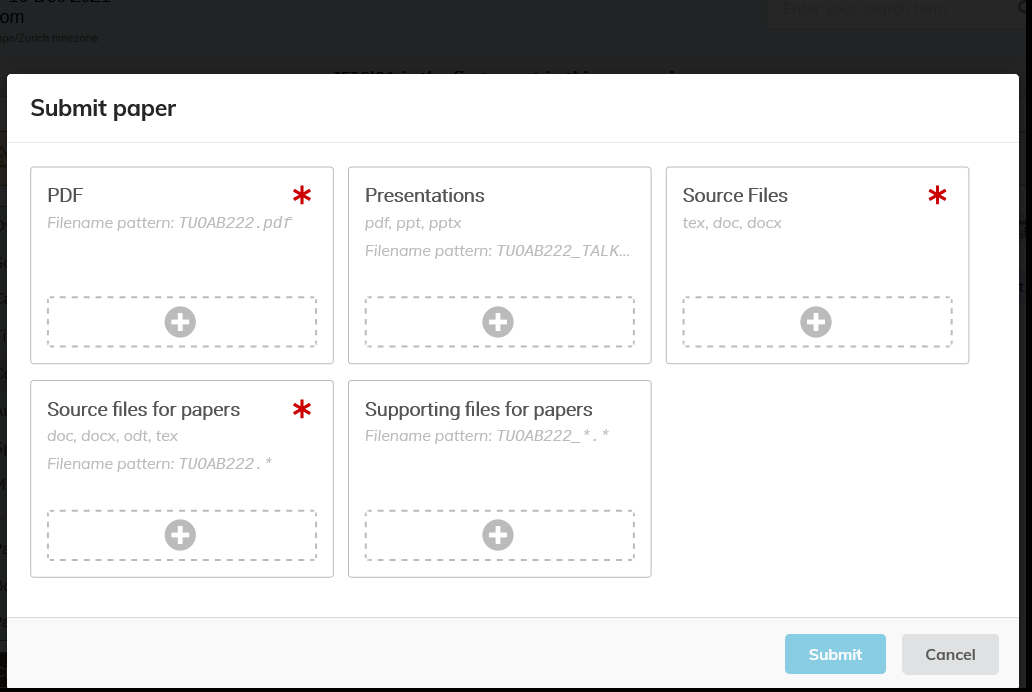
You can upload files to different folders (file types). Red stars indicate where a file is required. Once the file has been uploaded to the folder, the star becomes black. Each folder also indicates which file extensions are authorized and if the name of the uploaded file must follow a given naming scheme (it is likely that the programme code of the contribution will be requested in the file name).
The Submit button will be activated only when all required files will be uploaded and respecting the naming patterns.
Once submitted, you access the editing timeline of your contribution.
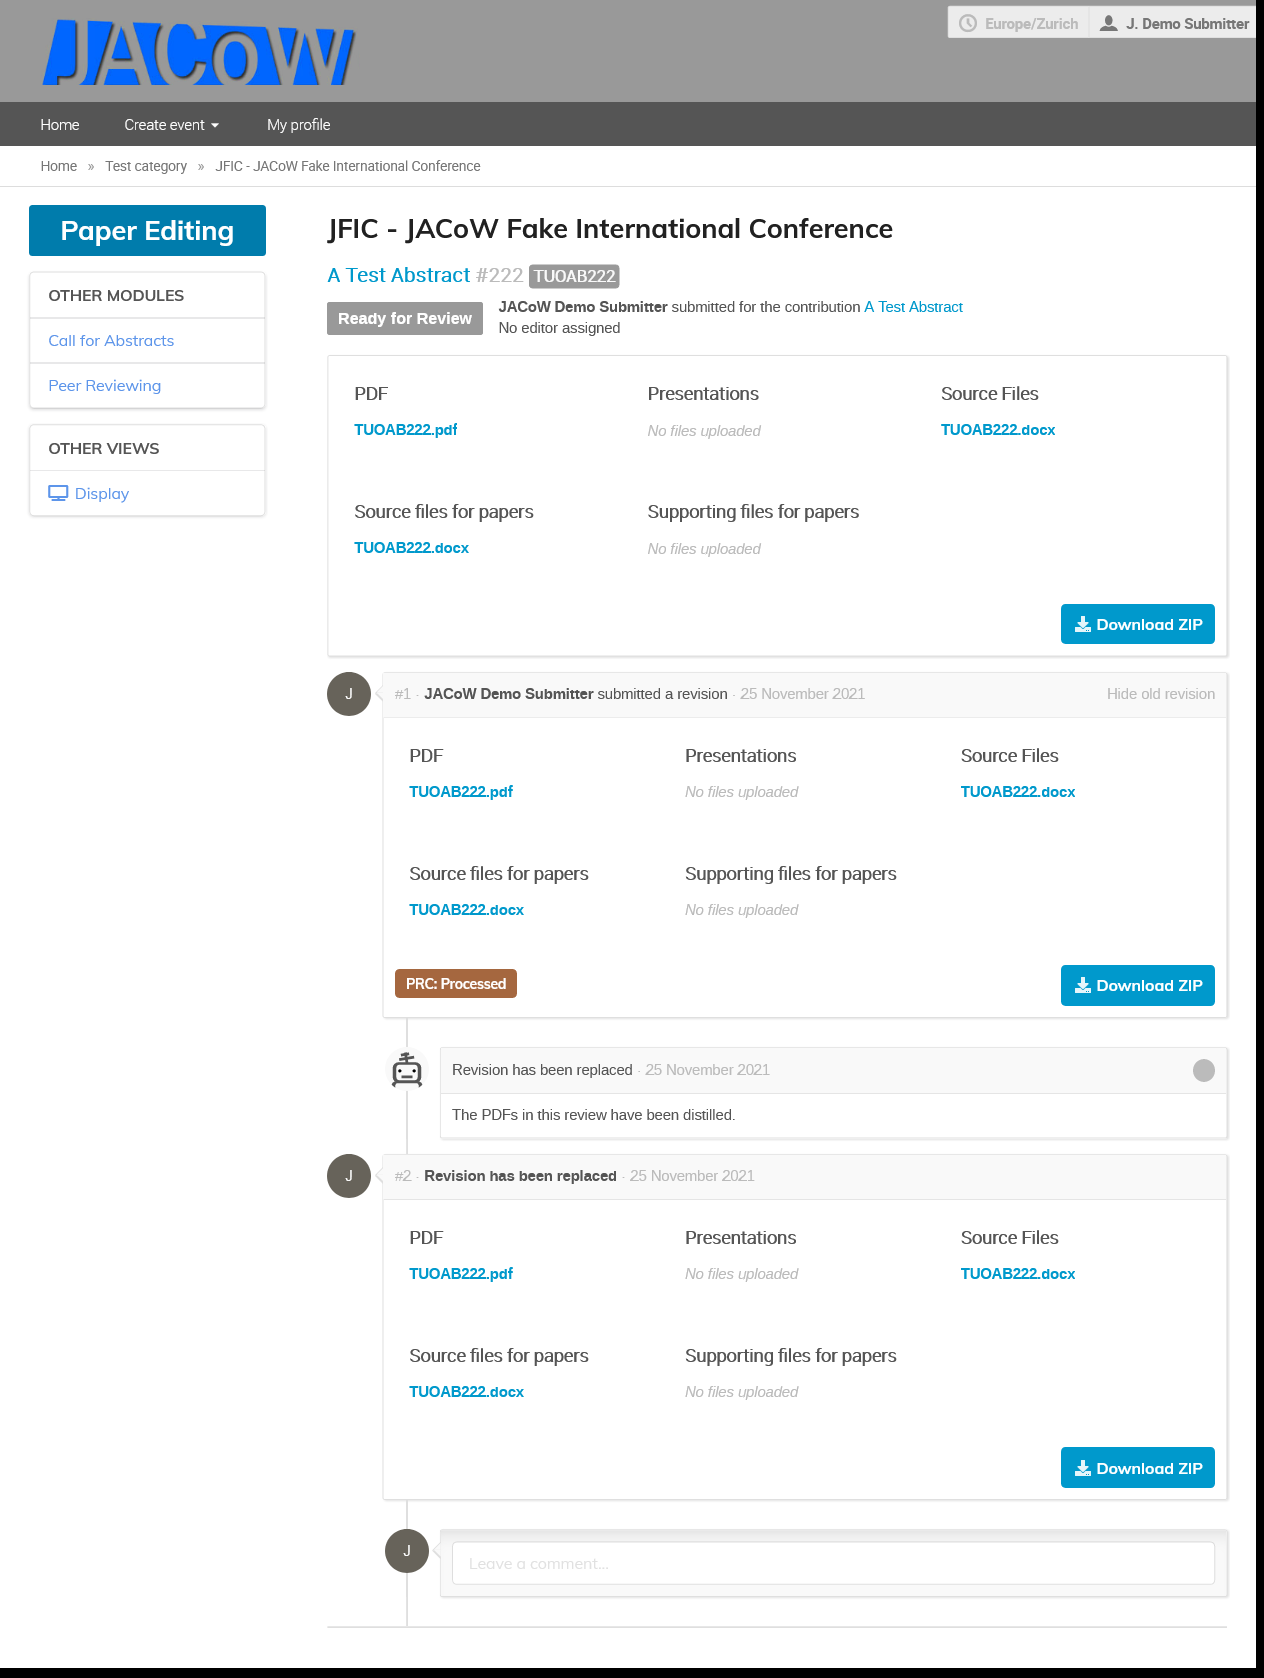
This page presents to you the status of the editing of your file and is where you will interact with the editor.
The upper box contains the current revision of your files (their latest version). Under it, you will see a timeline of all actions which have been taken during the editing process by the editor or by yourself by chronological order.
:::info
Each time your files are submitted in a JACoW conference, they will go through an automated distilling process which will ensure the quality of the PDF, and will appear as a new revision in the timeline, triggered by a robot avatar 
:::
### Sending Comments to editors
The timeline allows you to send comments to the editors at any time during the process.

To which the editors can answer. You are warned by email when an editor leaves a comment.

### Uploading a new version of the files
At some point in the editing process, the editor may ask you to do some changes on the uploaded files. You are warned by email when such a request is made, and the status of your contribution turns to "Needs Changes". In this case a new upload form will appear at the bottom of the timeline:

Editors can also assign error tags to the request for change which then appear as colored tags on the timeline.
### Approving a new version of the file
Editors can also edit the files themselves and upload the result. In this case the status of your contribution turns to "Needs Confirmation", you are alerted by email and you are requested to validate their changes through the interface.
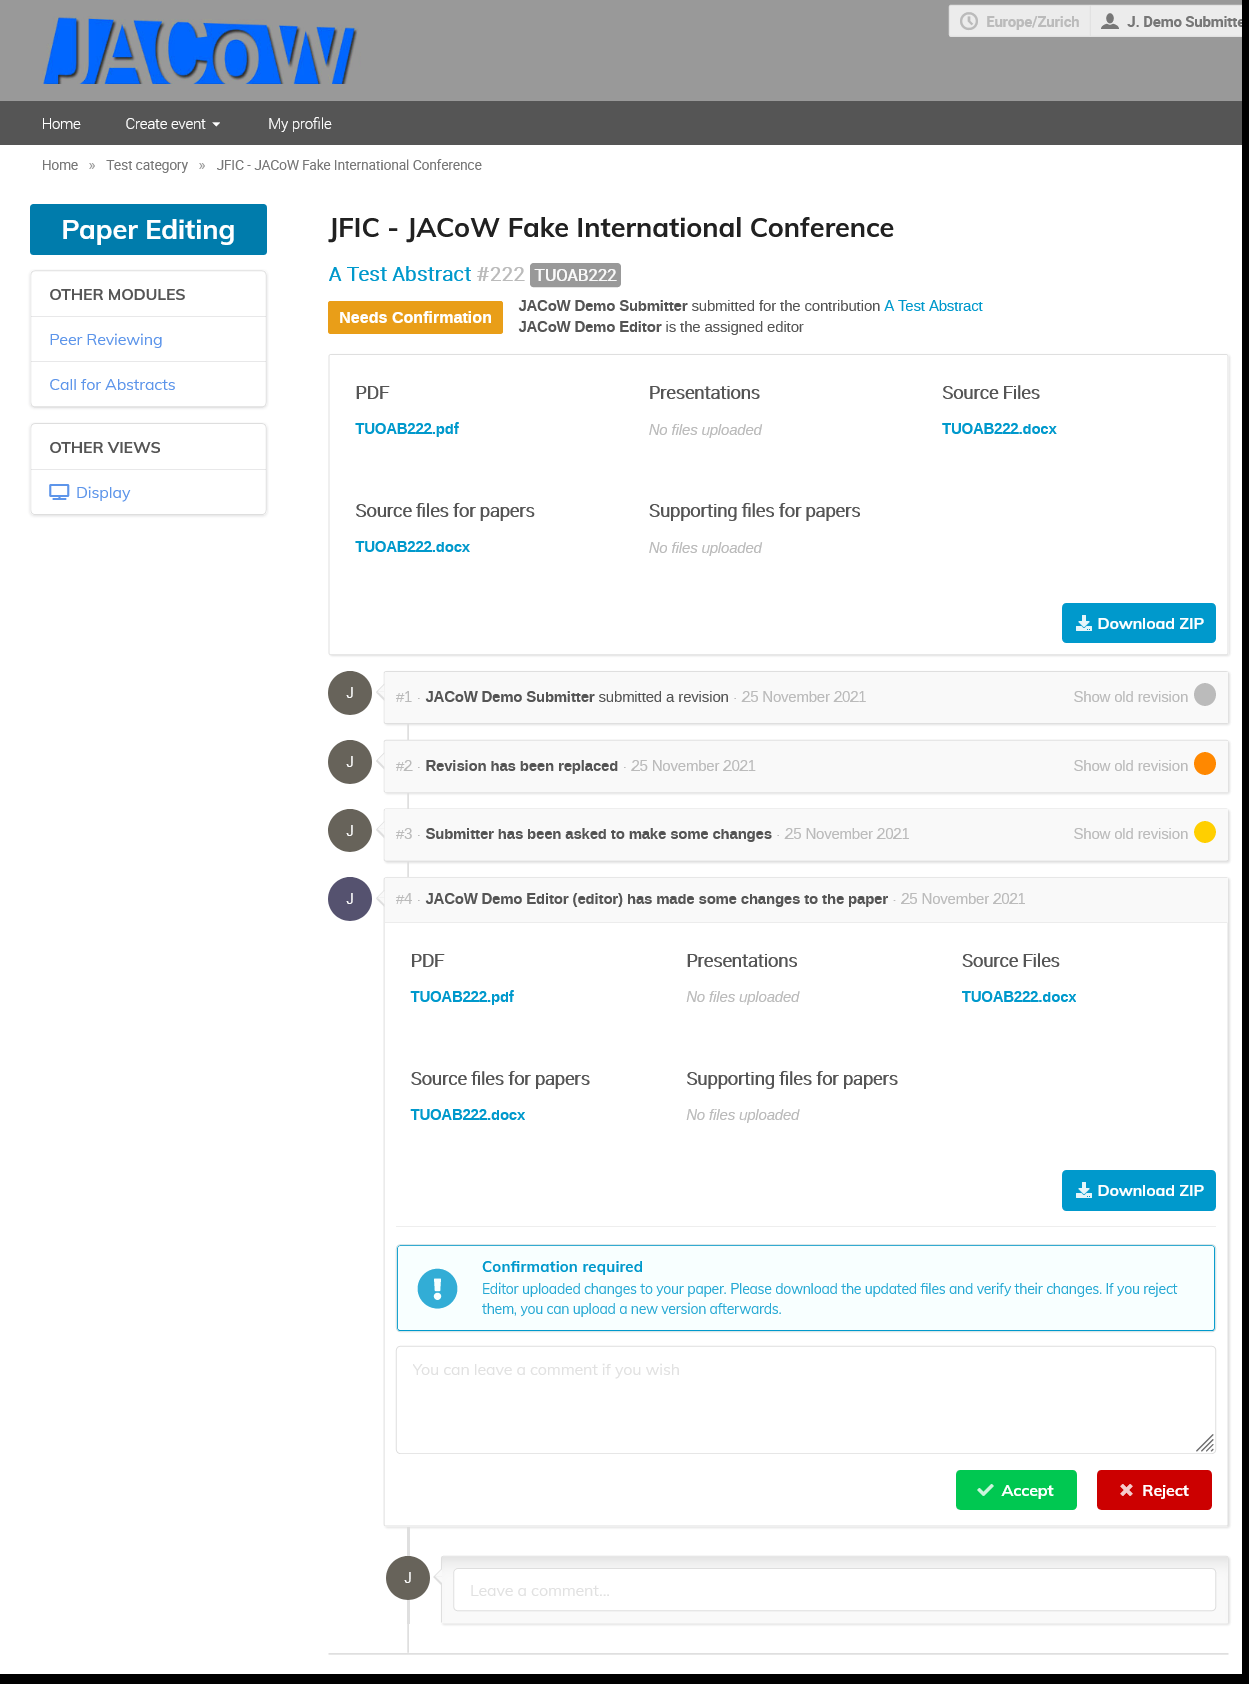
If **you reject the changes**, you will be asked to make the changes yourself, see the previous section.
If **you accept the changes**, the contribution is moved to the "Accepted" status and the editing is nearly over (it will go through a final QA process by the scientific secretariat).
## Publishing
Once an editable is on status "Accepted", it needs to pass the final QA before being moved to status "Published". This is shown by a "QA02: QA Pending" yellow tag assigned to the editable.
Only members of the "SS" (Scientific Secretariat) role can then proceed with the final QA and move the editable to the final "Published" state.
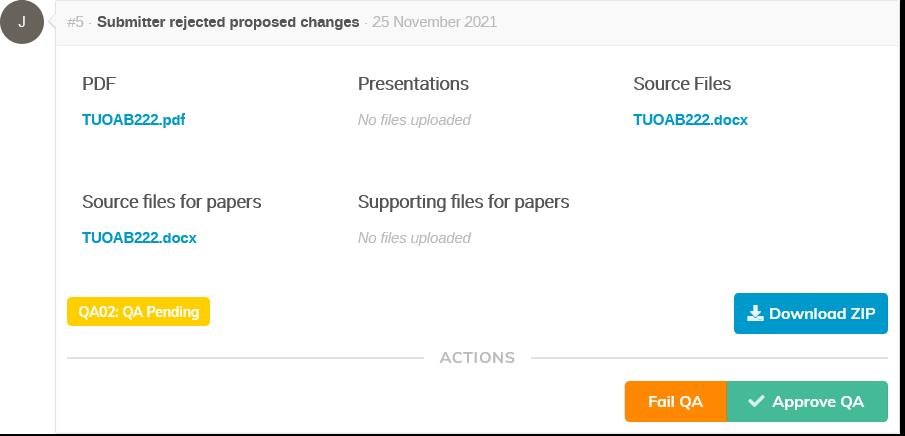
If the Scientific Secretary chooses "Fail QA" then the editable is moved back to the "Ready for review" status.
If the Scientific Secretary chooses "Approve QA" then the editable is moved to the final "QA01: QA Approved" tag.